Managing a few WooCommerce orders is usually straightforward. However, as your store grows, the standard order statuses may not provide enough information to organize every order effectively.
You may need to identify wholesale purchases, priority orders, local pickups, orders requiring manual review, or customers who should receive special handling. WooCommerce lets you manage order statuses and add order notes, but it does not include a native order tagging system.
In this guide, you will learn how to add customizable, color-coded tags to WooCommerce orders without writing any code.
What Are WooCommerce Order Tags?
Order tags are internal labels that help store administrators categorize and identify orders.
For example, you could create tags such as:
- VIP
- Wholesale
- High Value
- Urgent
- Manual Review
- Fraud Review
- Backorder
- Local Pickup
- Awaiting Documents
- Gift Order
An order can have more than one tag. For example, the same order could be labeled both Wholesale and Urgent.
Unlike order statuses, tags do not change the WooCommerce order-processing lifecycle. They add extra internal information that your team can use to organize work.
Order Tags vs. Order Statuses
WooCommerce order statuses describe where an order currently is in the standard order lifecycle. Examples include Processing, On hold, Completed, Cancelled, and Refunded.
Order tags serve a different purpose. They provide additional context without replacing or changing the order status.
For example, an order could have:
- An order status of Processing
- A VIP tag
- An Urgent tag
- A Local Pickup tag
Statuses are best used to represent the processing state of an order. Tags are better for internal categories, priorities, customer types, and custom workflows.
How to Add Order Tags in WooCommerce
The easiest way to add order tags is with the WooCommerce Order Tags plugin.
The plugin adds a visual tagging system to the WooCommerce admin area. You can create unlimited tags, assign multiple tags to an order, choose tag colors, display tags in the order list, and filter orders by tag. It is also compatible with WooCommerce High-Performance Order Storage.
Step 1: Install the WooCommerce Order Tags Plugin
To install the free version from WordPress.org:
- Open your WordPress dashboard.
- Go to Plugins > Add New Plugin.
- Search for Plugnition Order Tags for WooCommerce.
- Click Install Now.
- After installation finishes, click Activate.
You can also install the plugin by uploading its ZIP file through the WordPress plugin installer.
Step 2: Create Your First Order Tag
After activating the plugin, go to:
WooCommerce > Order tags
This page lets you create and manage the tags available for your orders.
Enter a name for the new tag, such as Priority, Wholesale, or Manual Review. You can also select background and text colors to make the tag easy to recognize in the order list.
Use colors consistently. For example:
- Red for urgent or high-risk orders
- Orange for orders requiring manual attention
- Blue for wholesale or B2B orders
- Green for VIP or approved orders
- Purple for local pickup orders
Once you have entered the tag details, click the button to add the new tag.
Step 3: Assign a Tag to an Order
To tag an individual WooCommerce order:
- Go to WooCommerce > Orders.
- Open the order you want to organize.
- Find the order tags section on the order editing screen.
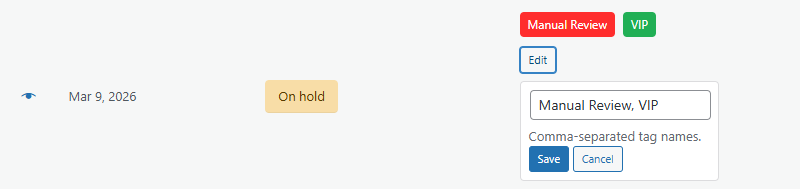
- Select one or more tags.
- Save or update the order.
The selected tags will remain attached to the order until you remove them. Because multiple tags can be assigned simultaneously, you can describe several aspects of the same order without creating complicated custom statuses.
Step 4: View Tags in the WooCommerce Orders List
Return to WooCommerce > Orders.
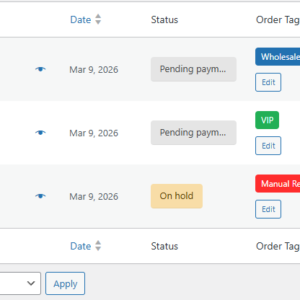
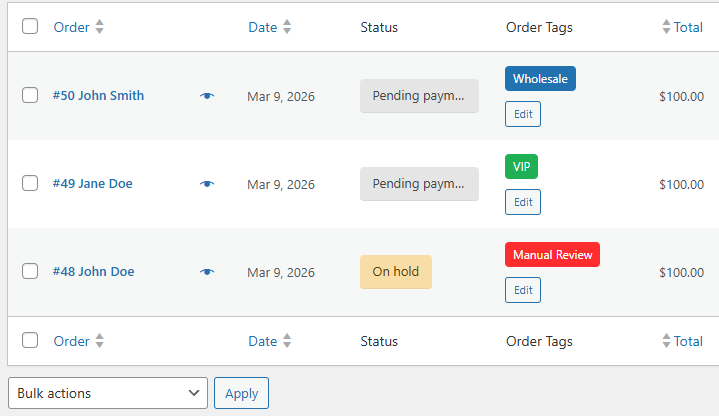
Your assigned tags will appear as color-coded labels in the orders table. This makes it possible to identify important orders without opening every order individually.
For example, your fulfillment team could immediately see which orders are:
- Urgent
- Wholesale
- Awaiting pickup
- Being manually reviewed
- Associated with VIP customers
This is particularly useful when several employees manage orders, and everyone needs a consistent way to identify special cases.
Step 5: Filter WooCommerce Orders by Tag
The plugin adds an order tag filter to the WooCommerce orders screen.
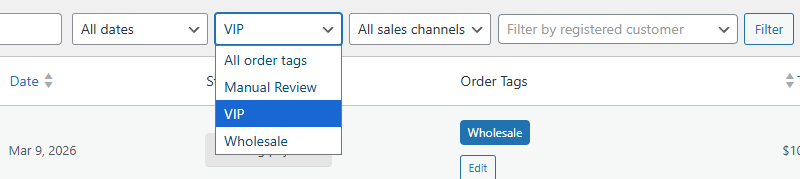
To find orders with a particular tag:
- Open WooCommerce > Orders.
- Select an order tag from the available filter.
- Apply the filter.
The table will show only orders associated with the selected tag.
For example, you could use the filter to find:
- All orders awaiting local pickup
- All wholesale orders
- All orders requiring fraud review
- All urgent orders
- All orders placed by VIP customers
Step 6: Add or Remove Tags in Bulk
When you have many orders, updating each order separately can take too much time. The Pro version of WooCommerce Order Tags adds bulk operations for applying or removing tags from multiple selected orders.

To bulk-manage your order tags:
- Go to WooCommerce > Orders.
- Select the orders you want to update.
- Choose the appropriate tag action from the bulk actions menu.
- Select the tag you want to add or remove.
- Apply the action.
This can be useful when processing a batch of wholesale purchases, marking several orders for manual review, or assigning a fulfillment-related tag to multiple orders at once.
Practical Ways to Use WooCommerce Order Tags
Prioritize Urgent Orders
Create an Urgent or Priority tag for orders that must be shipped sooner than your standard processing time.
The colored label makes these orders more visible to your fulfillment team.
Separate Wholesale and Retail Orders
If your store serves both retail and wholesale customers, add a Wholesale or B2B tag to relevant orders.
You can then filter wholesale orders when preparing invoices, checking payment terms, or managing bulk shipments.
Mark Orders for Manual Review
Some orders may need to be reviewed before fulfillment due to an unusual address, a payment issue, a customization request, or a potential fraud risk.
Tags such as Manual Review, Address Check, and Fraud Review clearly communicate that the order requires attention.
Organize Local Pickup Orders
Apply an Awaiting Pickup tag to orders that customers will collect from your physical location.
After the customer collects the order, remove the tag or replace it with a tag such as Collected.
Identify VIP Customers
Use a VIP tag for orders placed by important or repeat customers.
Your customer service and fulfillment teams can then recognize these orders and provide the appropriate level of service.
Track Custom Fulfillment Steps
Order statuses may not reflect every step in your internal workflow. Tags can provide additional details such as:
- Awaiting customization
- Documents received
- Quality check required
- Ready for packing
- Supplier confirmation needed
Because an order can have multiple tags, you can add this context without creating a large number of custom WooCommerce statuses.
Best Practices for Managing Order Tags
Keep Tag Names Short
Tags appear in the orders table, so short names are easier to read. Use Manual Review instead of a long label such as This order must be manually reviewed.
Avoid Duplicate Meanings
Do not create several tags that mean nearly the same thing, such as Priority, High Priority, Urgent, and Rush, unless your workflow clearly distinguishes between them.
Use a Consistent Color System
Create a simple internal color convention and use it consistently. Your team should be able to understand the general meaning of a tag from its color.
Remove Tags That Are No Longer Relevant
Some tags describe temporary conditions. For example, remove the Manual Review tag after the review has been completed.
Keeping tags up to date prevents outdated labels from confusing your team.
Document Your Tagging Process
If multiple employees manage orders, create a brief internal guide explaining when each tag should be added or removed.
A consistent process makes filtering more reliable and prevents different team members from using tags in conflicting ways.
Are WooCommerce Order Tags Compatible with HPOS?
Yes. Plugnition Order Tags for WooCommerce is compatible with WooCommerce High-Performance Order Storage (HPOS).
HPOS stores order information in dedicated WooCommerce order tables instead of relying entirely on the traditional WordPress posts and post meta tables. WooCommerce has enabled HPOS by default for new installations since WooCommerce 8.2.
When choosing any plugin that reads or modifies order information, HPOS compatibility is important because extensions designed only for the legacy order-storage system may not work correctly on modern WooCommerce stores.
Frequently Asked Questions
Does WooCommerce Include Order Tags by Default?
No. WooCommerce includes order statuses and order notes, but it does not provide a native system for creating reusable, filterable order tags.
Can an Order Have Multiple Tags?
Yes. You can assign multiple tags to the same order. For example, one order can be tagged as Wholesale, High Value, and Urgent.
Can I Change the Tag Colors?
Yes. Each tag can have its own color, allowing you to create a visual system that matches your internal workflow.
Can Customers See the Order Tags?
The tags are intended for internal order management in the WooCommerce admin area. They are not designed to appear to customers on the storefront or account pages.
Can I Filter Orders by Tag?
Yes. You can select a tag from the filter on the WooCommerce Orders screen to display only orders assigned to that tag.
Can I Add Tags to Multiple Orders at Once?
Bulk adding and removing tags is available in the Pro version of WooCommerce Order Tags.
Do I Need to Write Any Code?
No. The plugin adds the tagging interface directly to the WooCommerce admin area, so tags can be created, assigned, and filtered without custom development.
Conclusion
WooCommerce order tags provide a flexible way to organize orders without changing their statuses or relying on scattered internal notes.
With color-coded tags, you can identify priority purchases, wholesale orders, local pickups, manual reviews, VIP customers, and other special workflows directly from the WooCommerce orders screen.
The free version provides the essential tools for creating, assigning, displaying, and filtering order tags. Stores that process a higher volume of orders can use the Pro version to add or remove tags in bulk.
Recommended Plugins
-
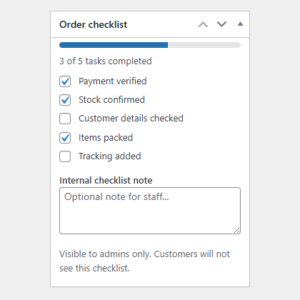
WooCommerce Order Checklist
Adds an internal checklist to WooCommerce orders so store staff can track fulfillment, verification, and custom order tasks.
-
WooCommerce Order Duplicator
Duplicate WooCommerce orders with one click, bulk actions, settings, notes support, and HPOS compatibility.
-
WooCommerce Order Item Cost Editor
Edit WooCommerce individual order item prices (not just the line total) with the “WooCommerce Order Item Cost Editor” plugin.
-
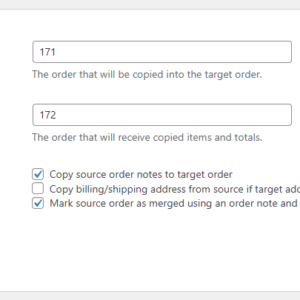
WooCommerce Order Merge
Merge WooCommerce order items, fees, shipping lines, coupons, notes, and customer details into a target order without deleting source orders.
-
WooCommerce Order Note Templates
Create reusable order note templates and insert them into WooCommerce orders with one click, including prompt-based variables.
-
WooCommerce Order Splitter
Split selected WooCommerce order items into a new child order from the admin order screen.
-
WooCommerce Order Tags
Tag, organize, and find WooCommerce orders faster.
-
WooCommerce Order Timeline
Adds a clean internal order timeline to WooCommerce orders, showing key order events, notes, status changes, and manual timeline entries.